
Drag and drop employee rosters in minutes, share them easily with staff and optimise wage costs in real-time as you build.
Create or edit a roster whenever you need.
Rosters are based on Operations and can be organised around departments, locations, areas – it's entirely up to you. Set them up so they work for your business.
Have a think about who the roster is for. Locations in rosters correspond to locations set up in the employee profile. If you want rosters to show in a certain order, take advantage of the alphabetical display and name them accordingly. If the roster is for a new operation, make sure to set up the operation first.
When you want to create a roster, you’ll find them under the 'Work' section of the platform. Add a roster either as new or from an archive.

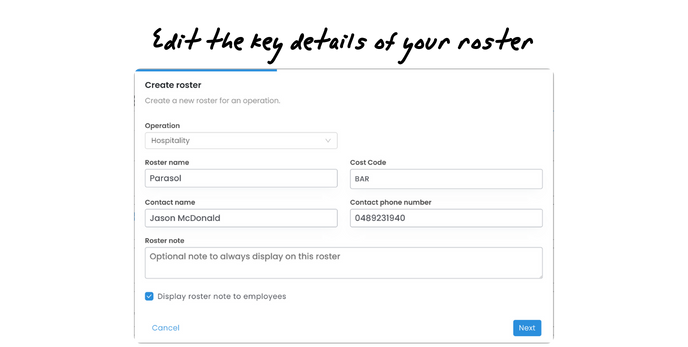
To create a new roster, you’ll need to enter a few essential details. This is where you can assign cost codes or purchase orders, notes and contact details. After this step, choose if and when you want notifications sent and to who.
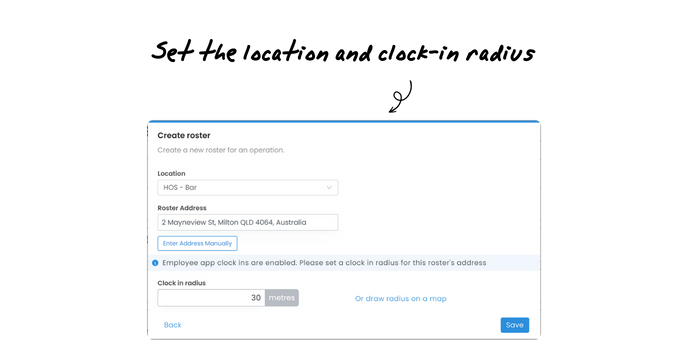
The last step is to select the location for your roster, an address, and if you have employee app clocking enabled, set a clocking boundary radius. Hit 'Save' and you’re ready to start adding employees and shifts.
Great! What if I need to edit one?
No worries - just find the roster you want to edit and click on the settings icon, make the changes and save!